Ordering Documents |

|

|

|
|
Ordering Documents |

|

|

|
|
|
||
Documents are stored in your personal library. They can be ordered as soon as they are uploaded or at another time.
To order a document:
| 1. | Click the Libraries tab. |
| 2. | Locate the document that you want to print.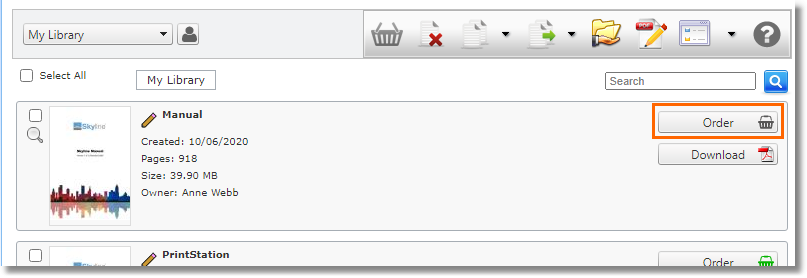 |
| 1. | Click the If you get the message "You must preview your document before continuing" click |
| 3. | The first step of the ordering process is to select the document type. The options available will be dependent on the options that your print room has specified. If there are some products that are not suitable for the document the products will be unavailable. The products can be organized into different categories if portal pricing is used. Click on each category tab to see the options available.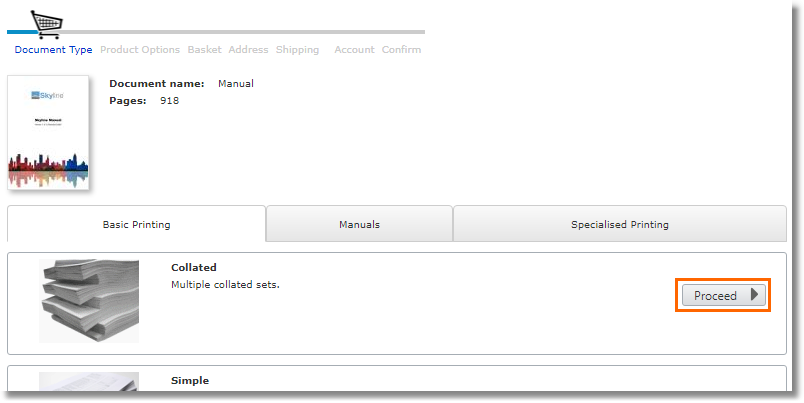 |
| 1. | Click the Proceed link corresponding to the type you require |
| 4. | You will now be offered some further options for the product you have chosen. For example, you may be offered a choice of paper colour or print in colour or mono print. 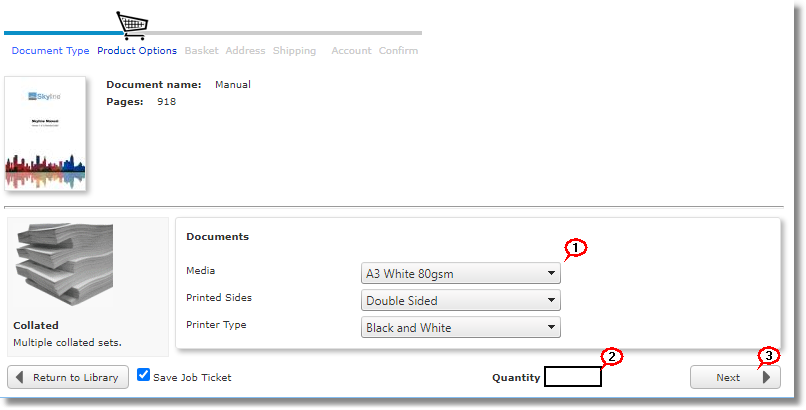 |
| 1. | Select the options for the product that you have selected. |
| 2. | Enter the number of document copies required. |
| 3. | Click Next to continue placing the order. |
| 5. | A quotation for the job may be displayed depending on the arrangements that you have with your print provider. You can change the quantity of documents that you want printed. Click 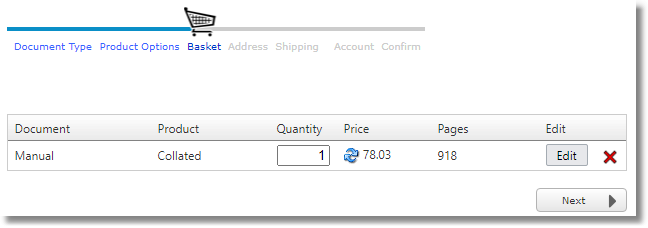 |
| 6. | The delivery address information is automatically completed if you have entered a delivery address. You can amend the address if you require the documents to be delivered to a different location. Field names showing in red are required fields.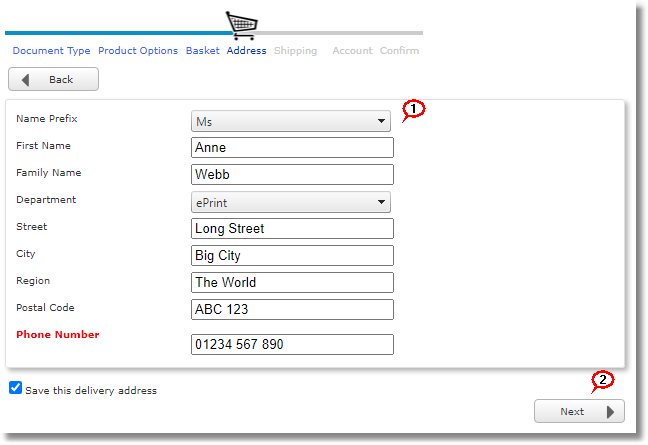 |
| 1. | Check the delivery address and amend the details if required. |
| 2. | Click Next to continue placing the order. |
| 7. | The shipping requirements form opens.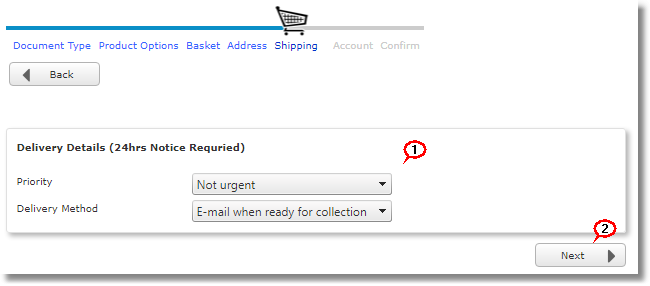 |
| 1. | Enter the delivery instructions and any additional information. Compulsory fields are labelled in red. |
| 2. | Click Next to continue placing the order. |
| 8. | You may be asked to specify or select an account code. This feature is only available if the accounts features have been selected for your portal. If you do not see the account page proceed directly to the next step.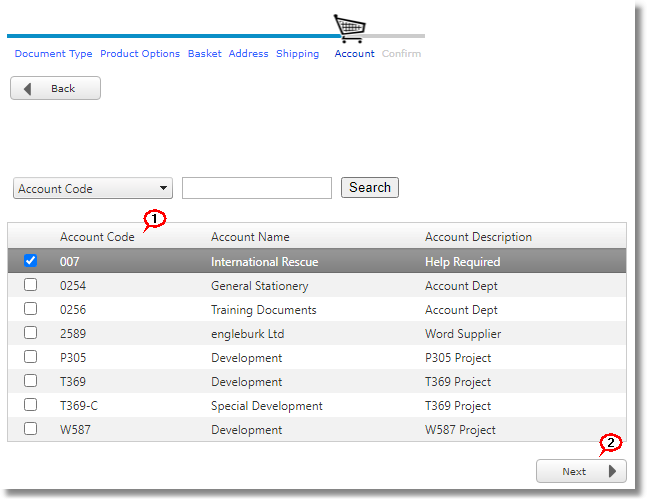 |
| 1. | Select the required account code. You can use the search facility to locate an account code. |
| 2. | Click Next to continue placing the order. |
| 9. | Check your order details and if the details are correct click Confirm Order to complete the order process. If the Smart Calendar is used you will need to select a delivery date before you can continue placing the order.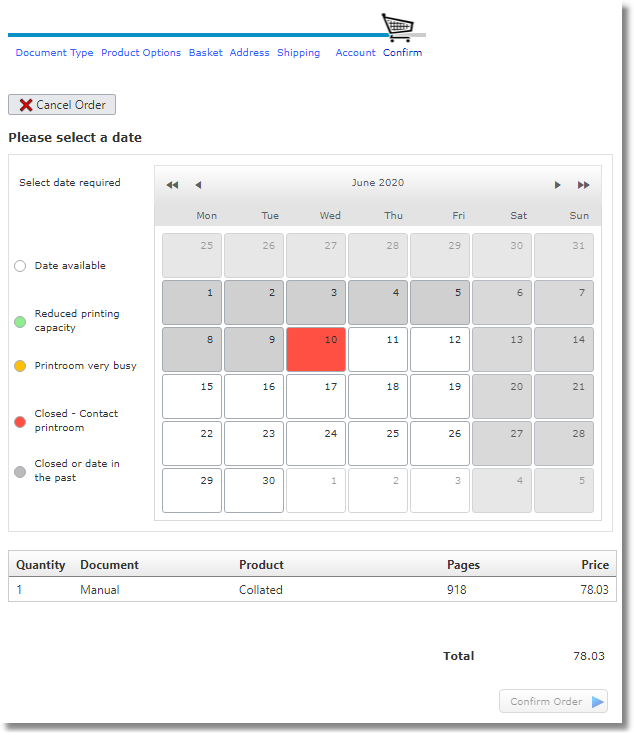 |
| 10. | Your order confirmation is now shown and an order number provided together with details of the cost if pricing is being used. The Print room will now receive your document and may (dependent on configuration settings) send you an email confirming receipt. If the option Approval has been turned on you will see a message that the document will not be printed until the document is approved.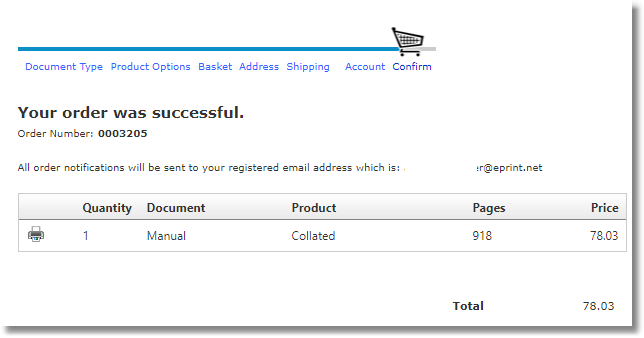 |
Skyline can be configured to automatically send an email to the person who placed the order to confirm that their order has been placed. An example email is shown below. The wording can be amended to suit the requirements of your organisation.
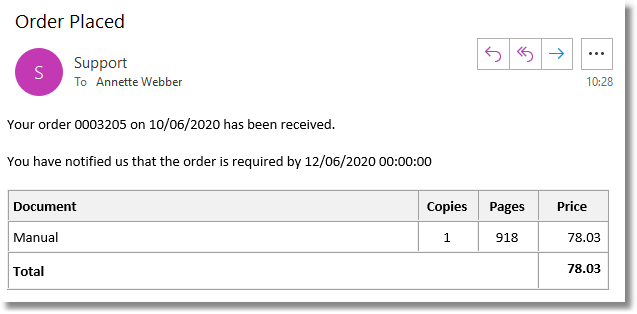
Example Email that is received when an order has been placed.