When the print room options have been configured you can create new products. When the products are made available to specific portals, end users can place an order on the print room using the new product.
If you are producing a booklet the document option Images Per Side must always be included in the body/pages document part though It can be hidden from the end user. The CostManager will correctly calculate the paper costs if the options Images per slide is used when creating products for Booklets.
If you are using the pricing facility, the Body document part should always contain the following document options:
•
Media - The paper stock that is available for the product. This option should always be at the top of the list.
•
Printed Sides - Double sided or single sided printing.
•
Printer Type - The user should be able to select whether the printing is colour or black and white.
To create a new product:
1.
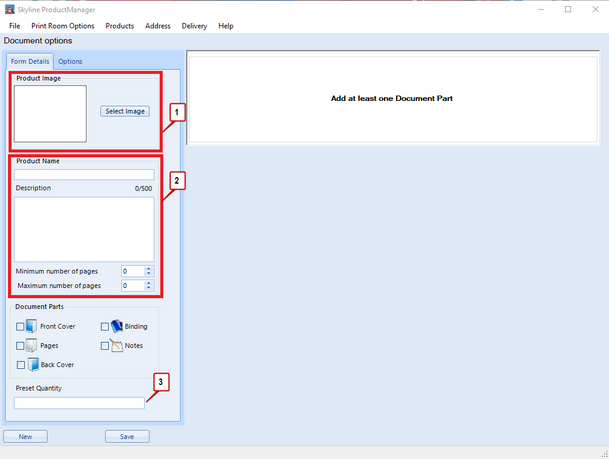
Select Products > New Product from the menu bar.
1.
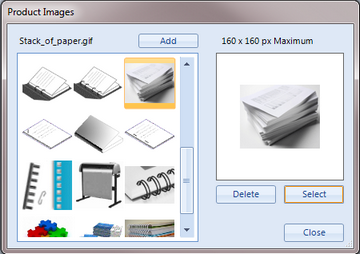
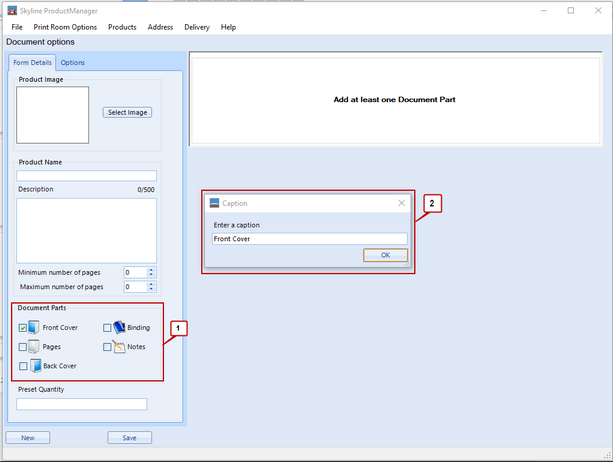
You need to select an image to represent the product. Click Select Image. The product image window opens. Select an image from the list of available images.
2.
Enter a name for your new product and a brief description. The minimum and maximum number of pages can also be set to define the products displayed in the user selection in the main Skyline application.
3.
(Optional) Leave blank so that any value can be entered when a user places an order.
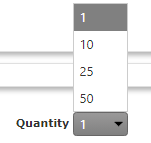
If you want to give a choice of how many copies can be ordered enter the required values separated by a comma. For example 1,10,25,50 would create a drop down box on the product containing just the values specified. See example below. If you wanted to enter a fixed quantity just enter a single number. The quantity required field will contain that number and the value cannot be changed when an order is being placed.
2.
The components comprise of our main parts that can be selected as required along with a selectable 'Notes' field.
1.
In the example the document part Front Cover had been selected. Once a part has been selected it is shown in the main area of the screen.
2.
The document part Pages is then selected. You are able to add a caption for the document part, as shown in the example.
3.
The print room options that have been setup can now be selected for the new product.
1.
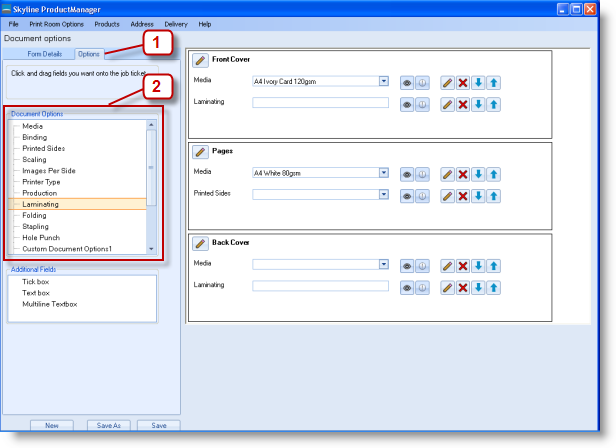
Click the Options tab. Each of the document parts that have been selected are showing in the main area of the window.
2.
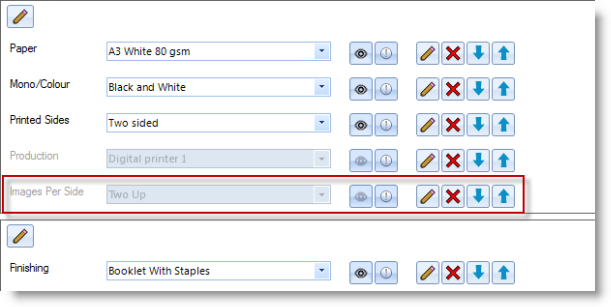
A list of the document options is shown. Each of the document options can be offered to the end user when they select the product type. Drag a document option from the list to a document part. If the option Laminating is used it should only be added to the Front Cover, Back Cover or Body sections. Custom Options MUST be added to the Binding document part which can be renamed to suit the product.
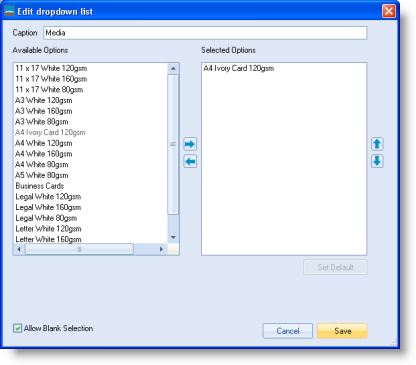
A window opens so that you can make specific choices regarding the option selected. For example, if you selected Media you would be able to change the caption and select the paper stock. Once you have made your selection click Save. Note: If you have a section of options and Allow Blank Selection is selected there will be no option automatically selected when the end user views the product options. If you want there to be a default product selected highlight the product and click Set Default. The selected option will show in red to indicate it is the default product.
4.
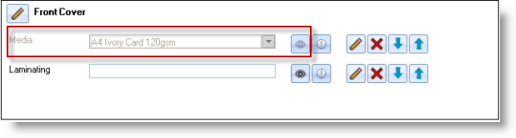
Each option selected is added to the document part. The option can be offered as a drop down selection or as an individual item which has conditions applied. The conditions can make the items mandatory or invisible to the user.
•
If there is no choice that the end user has to make, the option can be made invisible. To make an option invisible click . The option is shown greyed out.
•
Use to edit the option. For example, you might want to add another media choice to the option.
•
Use to delete the document option.
•
Use to amend the order that the document options will appear on the job ticket.