Fonts and the PDF Converter |

|

|

|
|
Fonts and the PDF Converter |
|
|

|
Fonts and the PDF Converter |
|
|
|
|
Fonts and the PDF Converter |
|
|
|
|
|
||
When documents are uploaded to Skyline, the PDF converter will first open the file in the application that was used to create it then use the application to print the document to PDF. If the document contains a font that is not loaded on the Skyline server then the application will attempt to replace it with a similar font, sometimes with unexpected results. Although nearly 400 fonts are available to use by default, on occasions a customer may require that a font be added to the Skyline server.
| Note: Only True Type fonts can be added. |
To add fonts for the PDF document converter to the Skyline Server:
| 1. | Install the new font on the Skyline server in the usual way. |
| 2. | Create a Word document that uses the new font. The document will be used to test the document converter so it needs to be on the Skyline server. |
| 3. | Open Windows Services by Start > Administrative Tools > Services. |
| 4. | Stop the service named DCStart.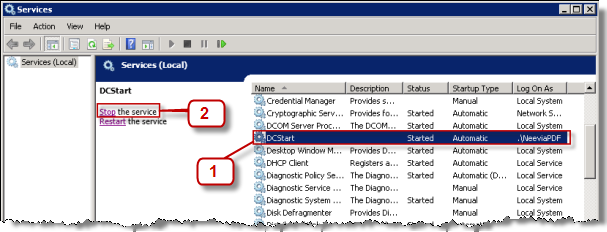 |
| 1. | Select the service DCStart. |
| 2. | Click Stop the service. |
| 5. | Open the directory where the PDF Converter is installed and locate the file FontMap.exe. Double click Fontsmap.exe to run the application. By default the path is C:\Program Files(x86)\Neevia.com\docConverterPro\modules. 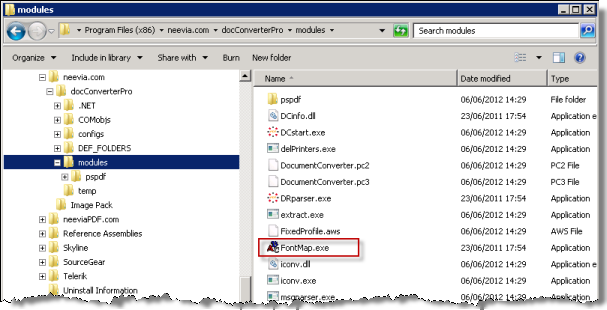 |
| 6. | The FontMap application opens.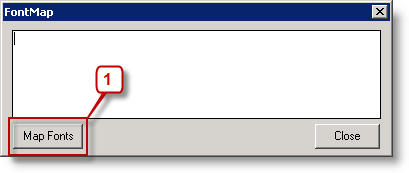 |
| 1. | Click the button Map Fonts. When all the fonts have been mapped the application automatically closes. |
| 7. | Open the Neevia Document Converter.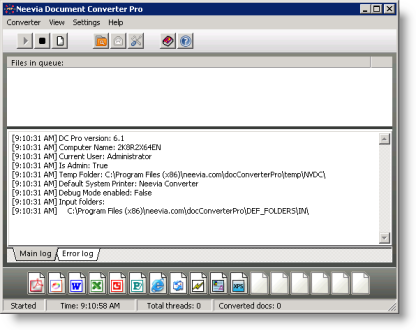 |
| 1. | Start > All Programs > Neevia Document Converter > Neevia Document Converter Pro. If nothing happens make sure that the program is not already open. |
| 8. | Open the Settings drop down menu and select Advanced Settings.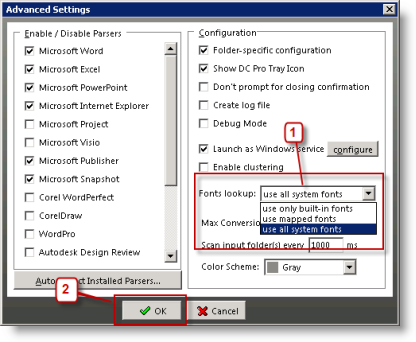 |
| 1. | Select the font look up use all system fonts. |
| 2. | Click OK to save the setting then close the window. |
| 9. | Close the Neevia Document Converter program. |
| 10. | Open the Printers folder. |
| 11. | Right click the printer Neevia Converter and select Properties (Printer Properties in Windows 2008).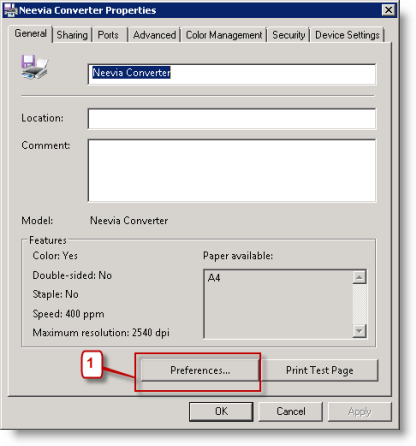 |
| 1. | Select Printing Preferences. |
| 12. | The Neevia Converter Printing Preferences window opens.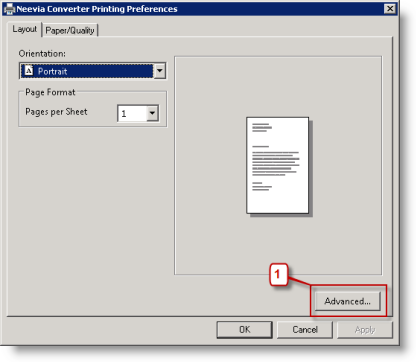 |
| 1. | Click Advanced. |
| 13. | The Neevia Converter Advanced Options window opens.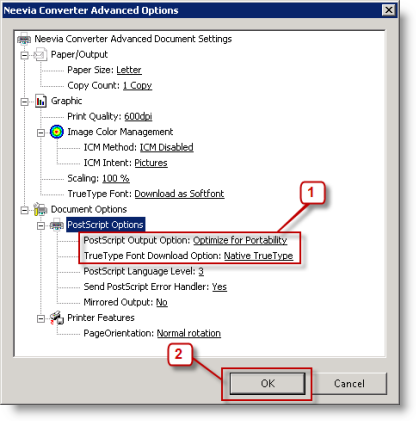 |
| 1. | Select the PostScript Output Option Optimize for Portability and the TrueType Font Download Option Native TrueType. |
| 2. | Click OK. |
| 14. | Open Windows Services by Start > Administrative Tools > Services and rrestart the service named DCStart. |
| 15. | Open the Neevia Document Converter. If nothing happens make sure that the program is not already open. |
| 16. | Drag and drop the Word document created with the new font into the Document Converter Pro window. This will create a PDF of the document in the same folder as the original. Check that when the document is converted to PDF that the new font is showing correctly. |
| If the fonts are not showing correctly, try re-booting the server and then running step 16 again. |