Before a Skyline Cloud Printer can be downloaded the printer settings need to be specified.
To enter your Skyline Cloud Printer settings:
1.
Log in with Administrator rights and go to Admin.
2.
In the Configuration section click Skyline Cloud Printer Settings.
3.
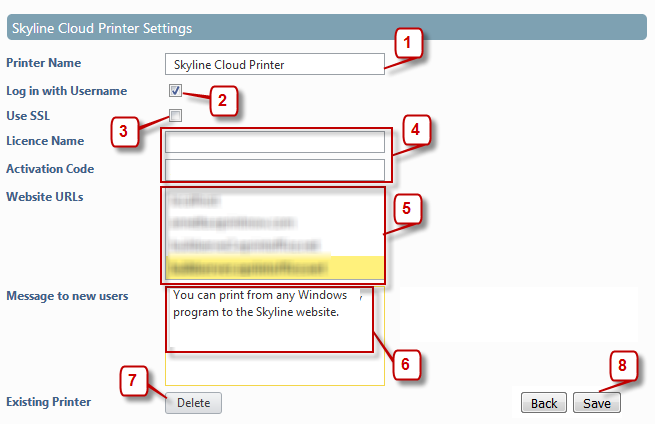
Details of your Skyline Cloud Printer settings need to be entered.
1.
Enter a name for the printer. This is the name that the user will see when they select the Skyline Cloud Printer from the print option.
2.
If your organisation wants users to log in with a user name and password select the option Log in with Username. If users are to log in with their email address and password, do not select this option.
3.
If you portal has been set to use HTTPS then select the option Use SSL.
4.
Enter the license name and activation code that you were supplied.
5.
Select the website URL that the printer is to be associated with. If there is only one URL then that URL will automatically be selected.
6.
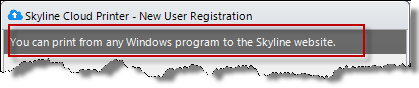
The Message to new users can be amended as required. The message will appear on the New User Registration form. This option will not be available of your portal has been set to LDAP authentication. Users will be using their corporate user name and password when configuring their Skyline Cloud Printer for the first time..
7.
If you are making changes to an exiting printer license click Delete to remove an existing printer settings.