Updating External Accounts |

|

|

|
|
Updating External Accounts |
|
|

|
Updating External Accounts |
|
|
|
|
Updating External Accounts |
|
|
|
|
|
||
When you need to update external account files on a hosted service you need to configure the system to update the information automatically. For example, the excel workbook containing the account details on your server is amended and then the copy that is on the hosted server needs to be updated. The update process is controlled by software called SyncBackPro which will update everything in a selected folder at a specific time.
You can fully automate the synchronization of the accounts file using the utility SyncBackPro. This will provide the following features:
| • | A scheduled service monitoring a shared folder using SyncBackPro. |
| • | At a specified time period any changes to the specified files in the shared folder are checked and any changed files are automatically uploaded to the FTP server. |
| • | All the FTP traffic is encrypted using a strong SSL certificate on the server. Non-encrypted traffic is not permitted. |
| • | The account codes are automatically updated on your Skyline portal. |
![]() Note: You need to Install and license SyncBackPro. The software can be purchased from http://www.2brightsparks.com. Before you are able to configure SyncBackPro you need the user name and password associated with your folder on the hosted server. Please contact Eprint for FTP access.
Note: You need to Install and license SyncBackPro. The software can be purchased from http://www.2brightsparks.com. Before you are able to configure SyncBackPro you need the user name and password associated with your folder on the hosted server. Please contact Eprint for FTP access.
To configure an external account file on a hosted service using SyncBackPro:
| 1. | Open SyncBackPro and open a new profile. 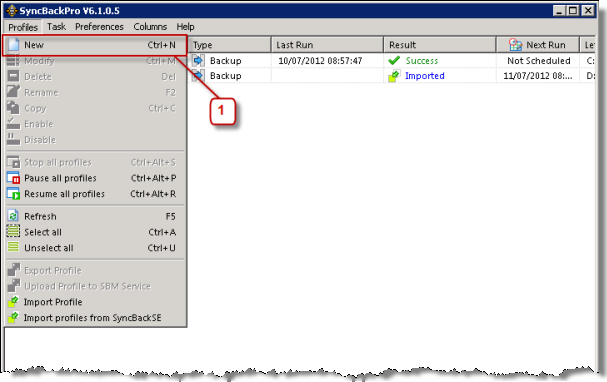 |
| 1. | From the Profiles drop down menu select New. |
| 2. | The New Profile window opens.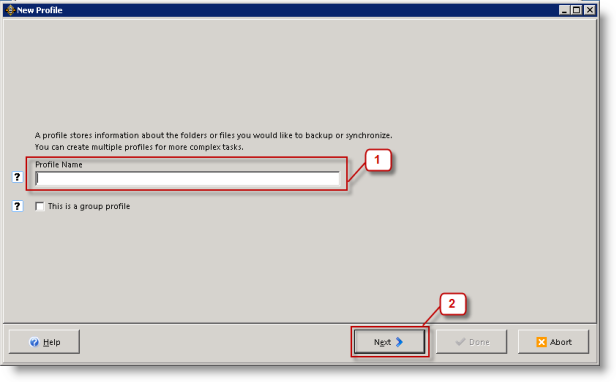 |
| 1. | Enter a name for your new profile. |
| 2. | Click Next. |
| 3. | You need to select the type of profile that you want to create.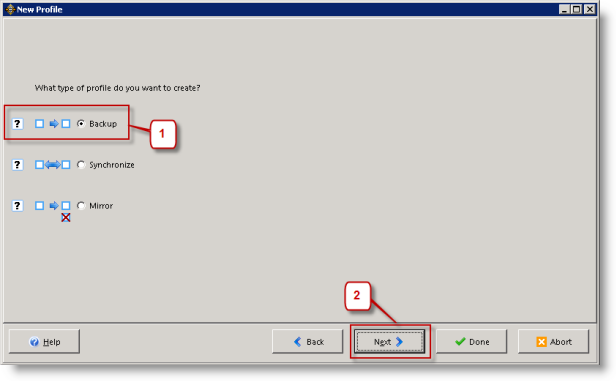 |
| 1. | Select the option Backup. |
| 2. | Click Next. |
| 4. | The locations of the files need to be specified.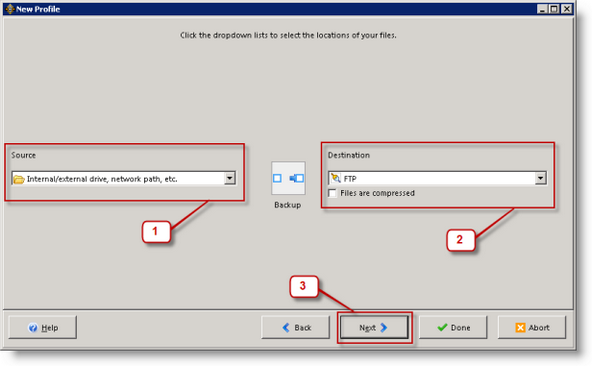 |
| 1. | Select the location that of the external accounts file. |
| 2. | The destination is FTP. |
| 3. | Click Next. |
| 5. | The FTP connection details need to be entered.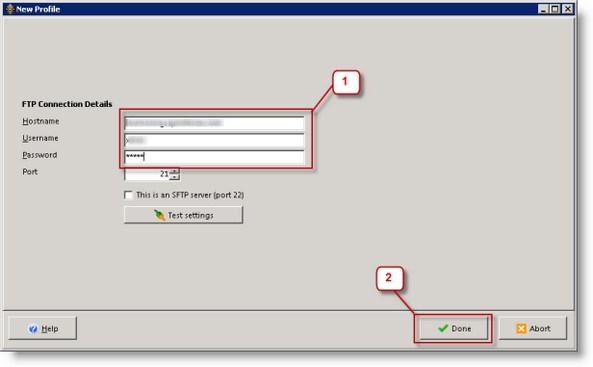 |
| 1. | Enter the Hostname, username and password as supplied by ePrint. |
| 2. | Click Done. |
| 6. | An information window opens stating that the main profile setup window will now open.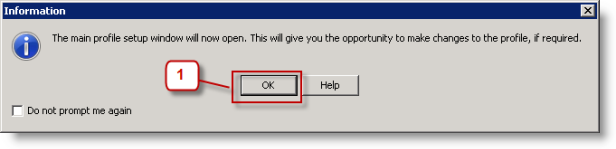 |
| 1. | Click OK. |
| 7. | The profile setup window opens.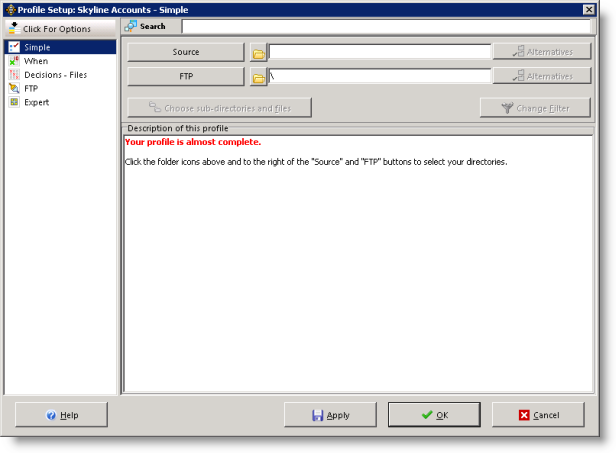 |
| 8. | The FTP advanced settings need to be configured.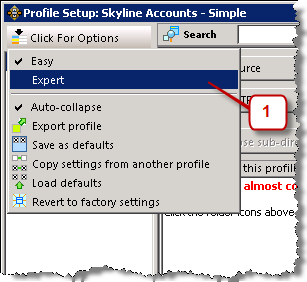 |
| 1. | From the Click for Options drop down menu select Expert. |
| 9. | There are more options available in the Profile setup window.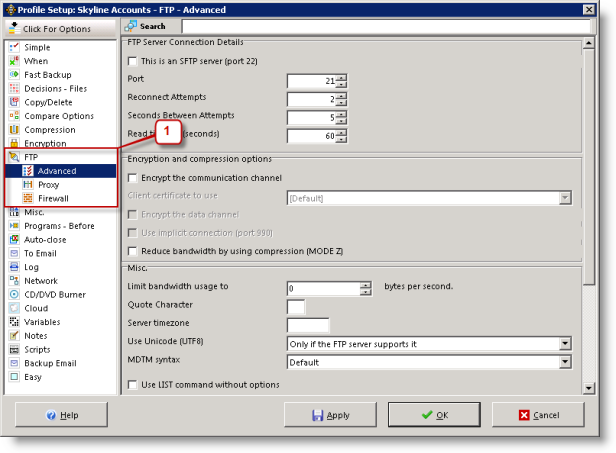 |
| 1. | Under FTP select the Advanced option. |
| 10. | The encryption and compression options need to be configured. |
| 1. | Select the option Encrypt the communication channel. |
| 2. | Select Encrypt the data channel. |
| 3. | Select Use implicit connection (port 990). |
| 4. | Select Yes when you receive the warning "You may need to change the FTP port number from 21. Would you like it changed to the default (port 990)". |
| 11. | The FTP Server connection details are updated.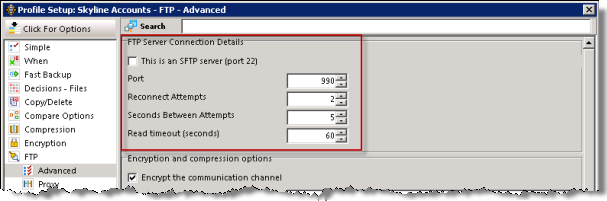 |
| 12. | The FTP settings need to be tested.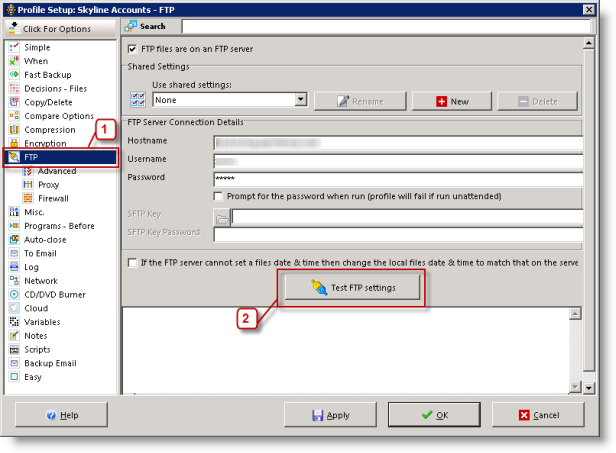 |
| 1. | Select FTP. |
| 2. | Click Test FTP settings. |
| 13. | The settings are tested. When complete you will receive the message that the FTP server was logged into.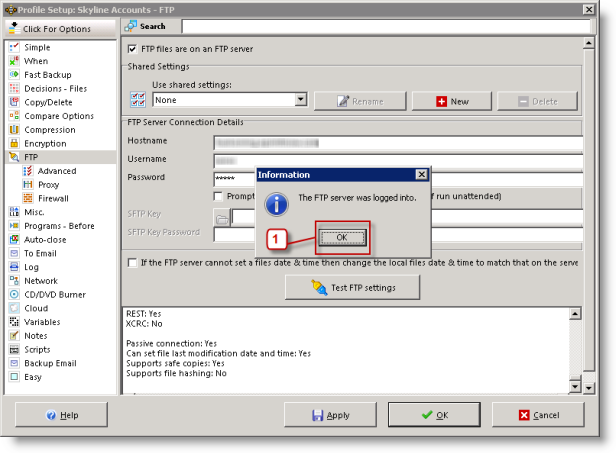 |
| 1. | Click OK. |
| 14. | The locations of the folder that contains your external accounts information needs to be specified.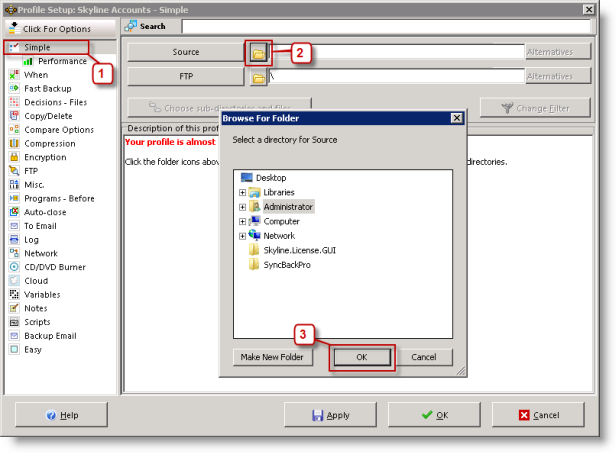 |
| 1. | Select the option Simple. |
| 2. | Specify the location of the folder by clicking Choose Directory. |
| 3. | Select the directory that contains the external accounts file and click OK. |
| 15. | Details of the profile are shown.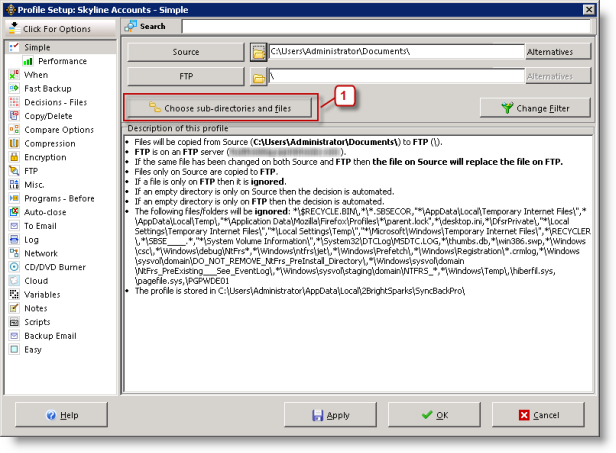 |
| 1. | Click Choose sub-directories and files. |
| 16. | A list of all the files in the selected folder is shown.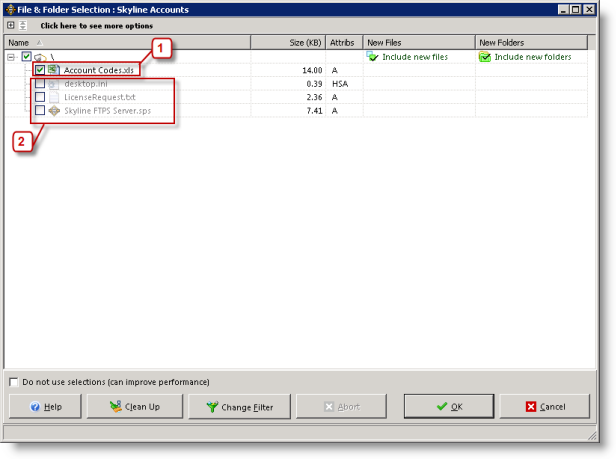 |
| 1. | Select the file that contains the accounts details. In the example the Excel file "Account Codes.xls" is selected. |
| 2. | Make sure that no other files are selected. |
| 17. | All new files added to the folder should be ignored.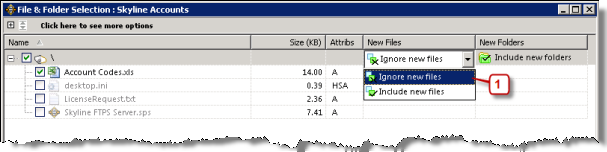 |
| 1. | Select the option Ignore new files. |
| 18. | All new sub-folders added should be ignored.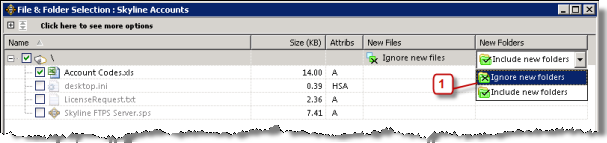 |
| 1. | Select the option Ignore new folders. |
| 19. | You are returned to the Profile Setup window.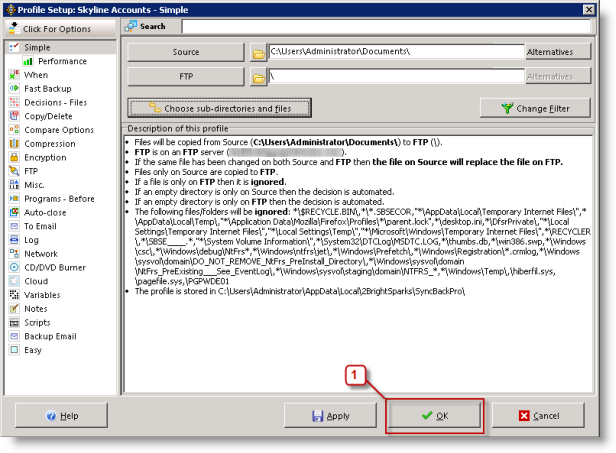 |
| 1. | Click OK. |
| 20. | You are asked if you would like to perform a simulated run for the new profile. |
| 1. | Click Yes. |
| 21. | A simulated test is run.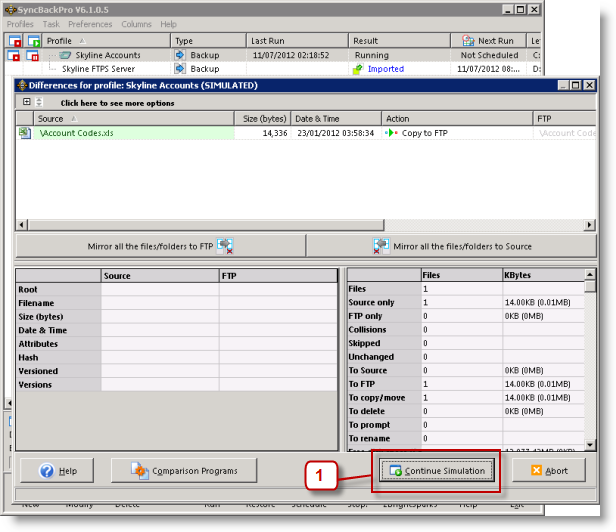 |
| 1. | Click Continue Simulation to complete the test. |
| 22. | When the test is complete you return to the main SyncBackPro window where the test result is shown.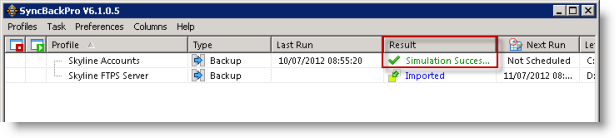 |
| 23. | As the simulation test has been completed a full test needs to be run.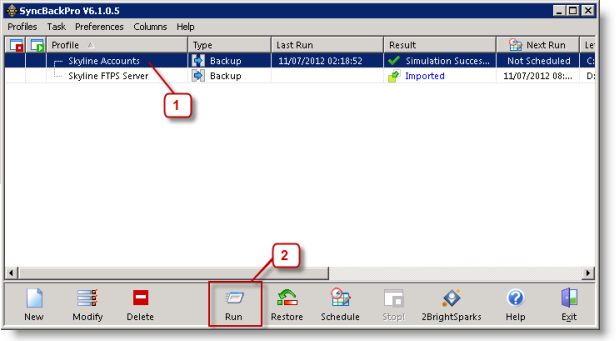 |
| 1. | Select the profile that you have just created. |
| 2. | Click Run. |
| 24. | The Differences for profile window opens.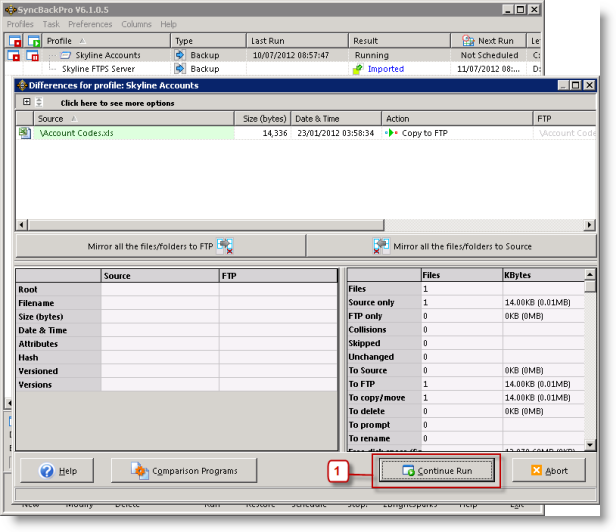 |
| 1. | Click Continue Run. |
| 25. | The test completes. You return to the main SyncBackPro window where the result of the test is shown.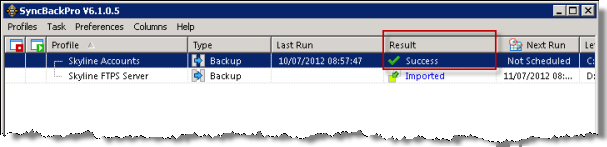 |
| 26. | The frequency that the profile is run needs to be configured. 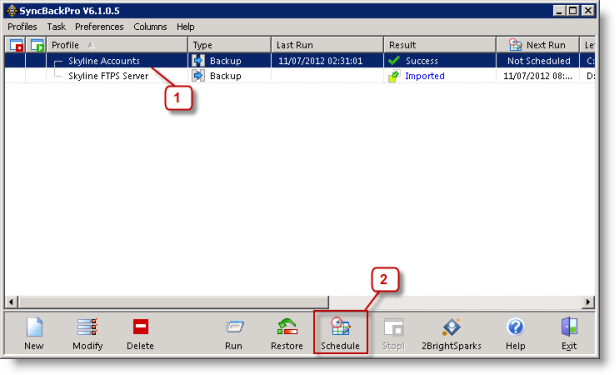 |
| 1. | Select the Profile. |
| 2. | Click Schedule. |
| 27. | Confirm that you want to create a schedule for the selected profile.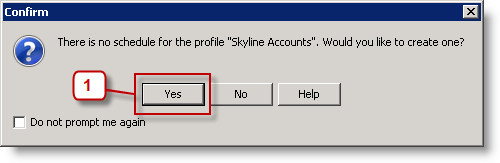 |
| 1. | Click Yes. |
| 28. | Enter your windows logon password.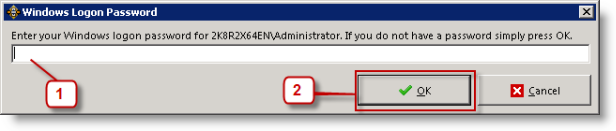 |
| 1. | Enter your password. |
| 2. | Click OK. |
| 29. | The Schedule window opens. Enter when you want the profile to run. In the example the profile will be run every weekday at 05:00. |
| 1. | Enter the schedule details then click OK. |
| 30. | A summary of the schedule created is shown. Click OK.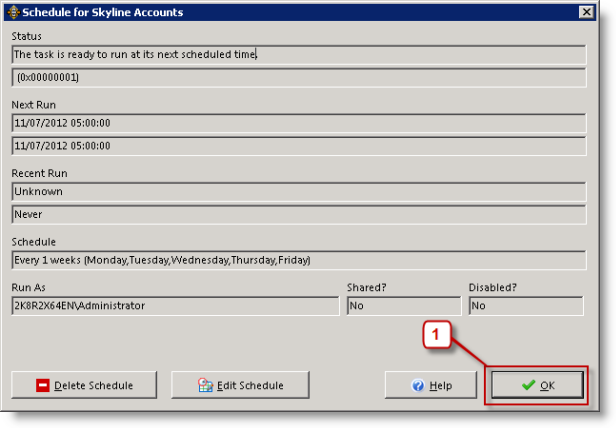 |
| 1. | Click OK. |
| 31. | At the main SyncBackPro window details of the next scheduled run are shown. |