Adding a folder |

|

|

|
|
Adding a folder |

|

|

|
|
|
||
You can output jobs to either printing devices or folders if the job is to be forwarded to another process. When you add a folder you need to specify the output format.
| • |
| • |
| • |
| • |
To add a folder:
| 1. | Select Setup > Folders from the drop down list.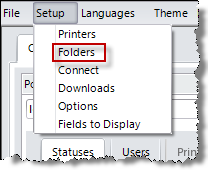 |
| 2. | The Folder Details window opens. Click New folder.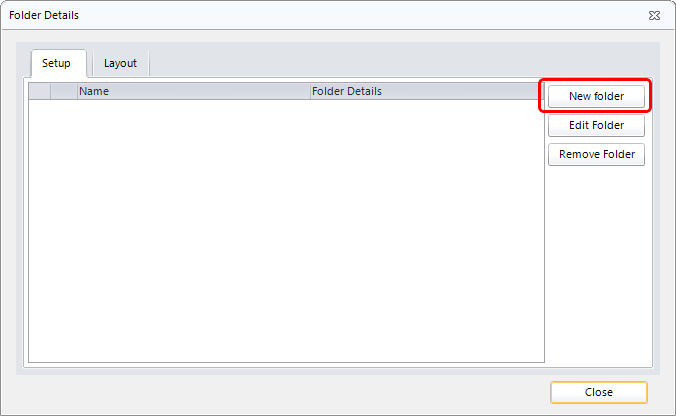 |
| 3. | The Add new Folder window opens.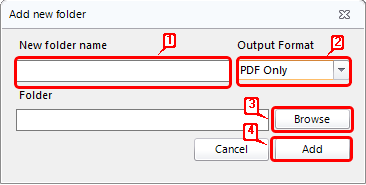 |
| 1. | Enter a name for the folder. For example, if you need to change a PDF into a folded booklet layout you could create a folder called Booklet to transfer any jobs that required this work to be completed before being printed. |
| 2. | Select the Output Format. |
| • | PDF Only - Select if you are creating a folder for a PDF that needs to be worked on. |
| • | PDF with XML - Two files are transferred into the folder, the PDF and a XML copy of the Job Ticket |
| • | Automate - A folder is created which is used in conjunction with Automate. |
| • | PDF with CSV - Two files are transferred into the folder, the PDF and a CSV copy of the Job Ticket |
| 3. | Click Browse to specify a location that the folder should be saved. |
| 4. | Click Add to create your new folder. If you have selected a folder that is already associated with an existing output folder you will receive an error message. Click OK and click Browse to specify a different location. 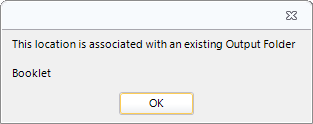 |
| 4. | The Folder Details window opens listing your new folder. All folders are listed under the output format selected and as you can see in the example below you can have more than one folder for each output format. |
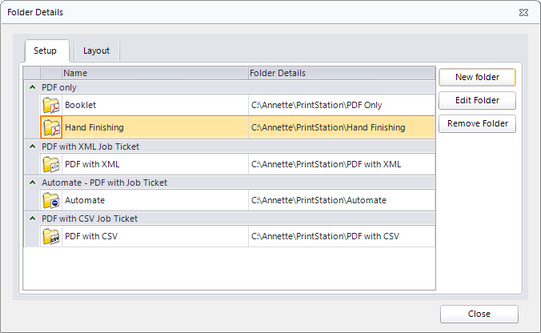
Example Folder Details Window.