4. Backup Database |

|

|

|
|
4. Backup Database |
|
|

|
4. Backup Database |
|
|
|
|
4. Backup Database |
|
|
|
|
|
||
It is strongly recommended that the SQL databases are backed up before running the utility IN ALL CASES. ePrint Direct cannot accept any responsibility for any loss of data. By proceeding with the backup, you agree that you will ensure the databases have been securely backed up before running this utility.
To run a manual backup:
| 1. | Take the website off line. |
| 2. | On the PC where the database is located, start the SQL Server Management Studio.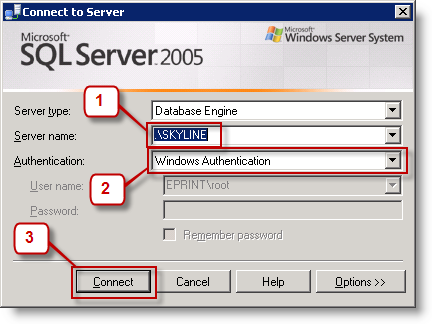 |
| 1. | The server name should be set to the name and instance of the SQL Server used by Skyline |
| 2. | Make sure that the authentication is set to Windows Authentication. This documentation only refers to a SQL Server that allows you to authenticate with Windows Authentication. If this is not possible, then you will need to seek assistance from a local Database Administrator. |
| 3. | Click Connect. |
| 3. | Expand the Databases node to see the Skyline database.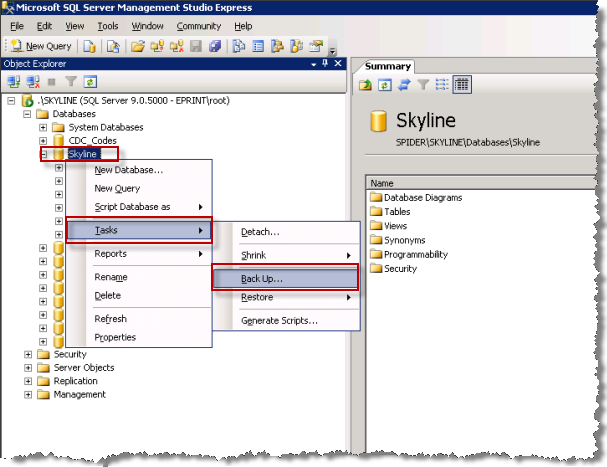 |
| 1. | Right click the Skyline database and select Tasks > Backup. |
| 4. | The Back Up Database - Skyline window opens. Any existing backup locations and names need to be removed.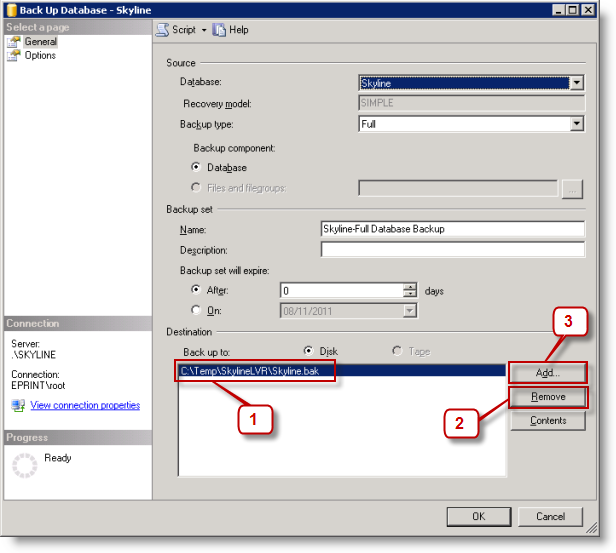 |
| 1. | Select the backup location to be removed. |
| 2. | Click Remove. |
| 3. | You need to add a location for your new backup when the backup location is blank. Click Add. |
| 5. | The Select Backup Destination window opens.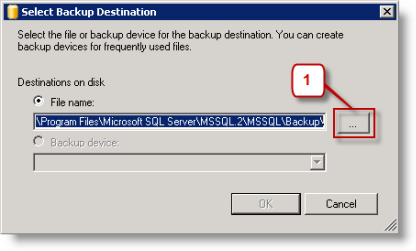 |
| 1. | Click Browse to select the location of the backup files. |
| 6. | The Locate Database Files window opens.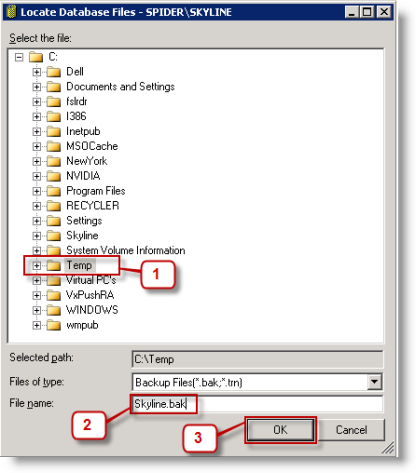 |
| 1. | Select a backup location. In the example the location selected is the Temp directory. |
| 2. | Enter the backup file name Skyline.bak to identify the name of the database being backed up. Make sure that you type the file extension .bak. |
| 3. | Click OK to continue. |
| 7. | You return to the Select Backup Destination window.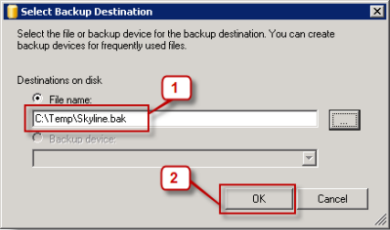 |
| 1. | The backup name and location that you have just entered are showing. |
| 2. | Click OK. |
| 8. | The Back Up Database - Skyline window opens.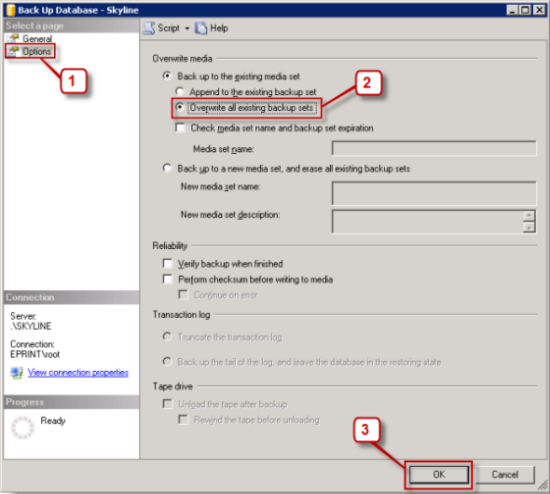 |
| 1. | Select Options. |
| 2. | In the Overwrite media section select Overwrite all existing backup sets. |
| 3. | Click OK to start the backup. |
| 9. | When you receive a message The backup of database 'Skyline' completed successfully. Click OK to continue.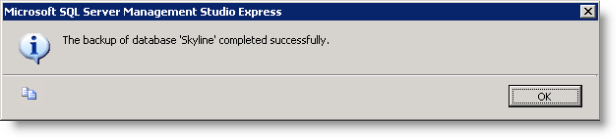 |
| 10. | Repeat the backup process for the SkylineConverter and SkylineMembership databases. Once all the Skyline databases have been backed up, you should have 3 files in the backup location. |
| • | Skyline.bak |
| • | SkylineConverter.bak |
| • | SkylineMembership.bak |